Fried Morel Mushrooms: Preparation And Step-By-Step Recipe
Mother Nature Proudly Serves Up One Of The Tastiest Treats, But Knowing The Secret Fried Morel Mushroom Recipe Is The Key

So you’ve been out in the woods for hours, gathering and collecting a plethora of mushrooms in your green mesh bag. Now what? You’ve never eaten a fried morel mushroom, let alone prepared them. Although the masses are excited about these woodland delicacies you have ZERO ideas about what to do now. Have you been conned into a cult-like ritual or is there something actually to the deliciousness of these hidden gems? Lucky for you that you’ve landed on this page because I will walk you step-by-step in preparing and cooking the ever-elusive Morel mushrooms. I share my very own family favorite Fried Morel Mushroom recipe and it’s so simple.
First Things First
First things first. You must clean the mushrooms you’ve gathered to get all the dirt and bugs out of them. Yes, there are BUGS in those mushrooms. What I like to do is first rinse them off. I normally give them their first cold water rinse just under the faucet stream.
Next, on my Gorilla Grip cutting board, I cut them long ways, down the middle, displaying two symmetrical sides. Under another water stream, I take my fingers and get in all the cracks and crevices to make sure all debris and bugs are thoroughly worked out.
The Next Step: Soaking
Not everyone soaks their mushrooms but I do. I like to make sure ALL the bugs are out even though I spend a lot of time during the rinsing process. Begin by placing the mushrooms in a roomy container. I fill it with cold water enough to completely cover the mushrooms and then add a teaspoon or two of salt ( I actually never measure this, I just dump).
And then I let it set overnight in the refrigerator.
After they’ve soaked for at least 24 hours you can rinse them one more time and they are ready to cook.
What You’ll Need As Far As Ingredients Go
Frying up your batch of Morels is one of the easiest things you’ll ever do. And my recipe takes the least amount of ingredients, which makes it super fast and easy. Mushrooms are not the prettiest but goodness sakes they are the tastiest. And in our household anything fried is ALWAYS yummy. The ingredients you need are: flour, eggs, canola oil (or whatever oil you prefer), and your prepared mushrooms. That’s it! Simple and basically what you probably already have in your cupboards.
Pan-Fried Battered Morel Mushrooms
Ingredients:
2 Cups All-Purpose Flour (in a separate container for rolling)
3 Eggs (beaten in separate container)
1/2 C Canola Oil
Cut and Prepared Mushrooms
Directions:
In a large skillet, put in your oil and turn the heat to medium to start to let it get hot. You want that first mushroom to sizzle when you put it in the skillet so depending on your stove, adjust accordingly. I usually put mine on medium and because I have a gas stove, it heats up pretty quickly. I will add that you can also use a deep fryer to fry your morel mushrooms. It’s just always easier for me to cook them on the stovetop.
I forgot to add in that I normally add salt and pepper to my flour before hand. Depending on your preference, you can add teaspoons of salt and a little pepper to your container of flour OR you can salt and pepper to taste while the mushrooms are cooking. Either way makes no difference in the end result. I do it both ways.
The Dipping Process
Next, I begin the process. Place your mushrooms in the egg batter (you can put a splash of milk in it also if you prefer) and make sure they are adequately saturated. However, make sure when you take them out of the egg dip that you don’t bring a big glob of egg with it. You’ll need all the egg batter, maybe even more, for the rest of the mushrooms.
Follow up by rolling into the flour mixture and then place the mushroom into the hot oil.
I’m not going to lie. This will be incredibly messy. Your fingers will get gunky with egg and flour but I promise you will survive it and the end result will be worth it.
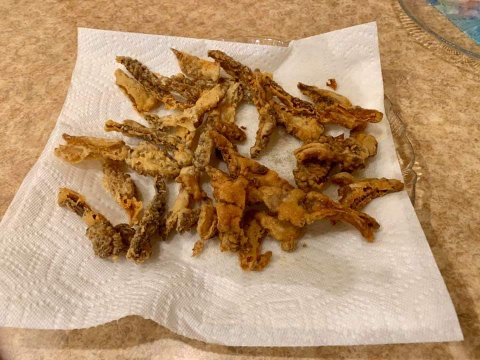
Let the mushroom get good and brown on one side before you turn it over. When the other side turns brown it’s time to take it out. Drain well. I drain on papertowels. Some people use newspaper and although that’s not my tool of choice, I have used newspaper in those times where I had nothing but.
It’s Hard But Let Them Cool Before You Dig In

Let cool before eating, although in our house I can fill a plate full of cooling mushrooms and look back and they’re all gone. That’s the beautiful thing about frying up a pan of Morels. They are so delicious that you can’t stop eating them. I’ve been known to get horribly sick from eating too many. Once you’ve eaten your first one, you won’t be able to stay out of them.
Now You’re An Official Morel Mushroom Addict
There you have it. The steps from beginning to end. It only takes one bite to solidify what all your friends and family have been trying to tell you about the taste of the beloved Morel mushroom. If you don’t care for the taste after all this, that’s perfectly okay. They’re not for everyone. But for those of us who look forward to mushroom season every year, I can say that we LIVE for spring because we know that we’ll be devouring these tasty morsels in one fell swoop. Well that is, of course, if we get our butts out there and find them.

